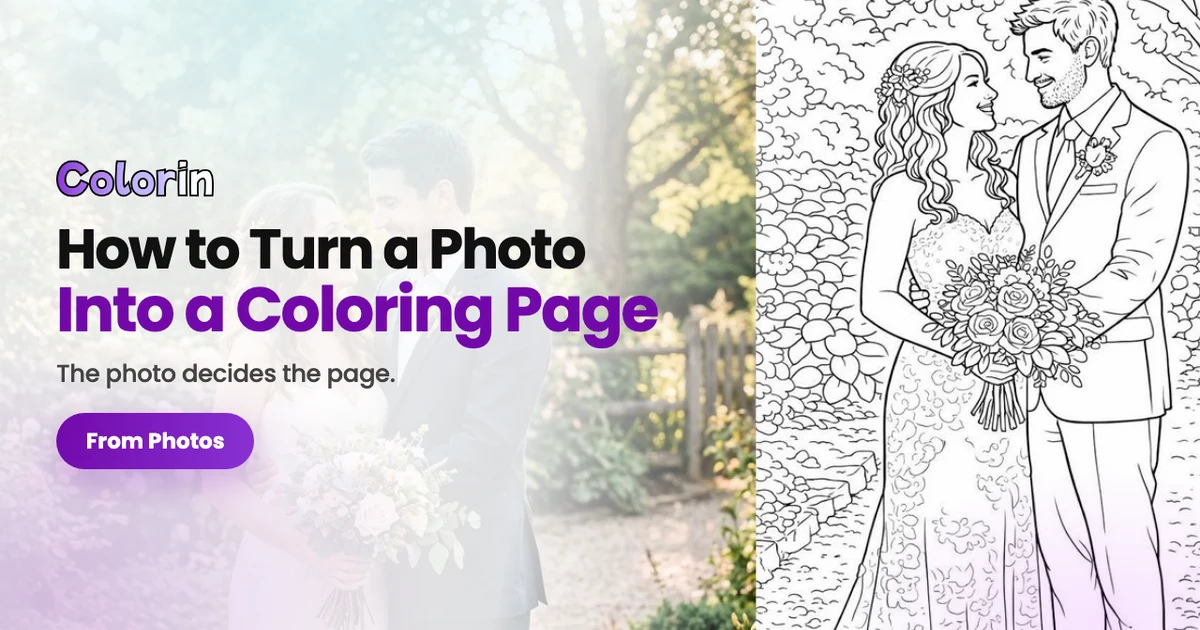
To turn a photo into a coloring page, upload it to Colorin AI under Create, choose a style and a size, and press Generate: the page comes back in under a minute and costs 6 credits in portrait. What decides how it looks is the photo you pick, with the subject filling the frame and even light on it. Four photos converted on September 9, 2026 came back that way in one pass each.
The tool does the conversion. Your part is picking the right photo, which is most of this guide, because that is what decides whether the page comes back as clean lines or as a gray scribble.
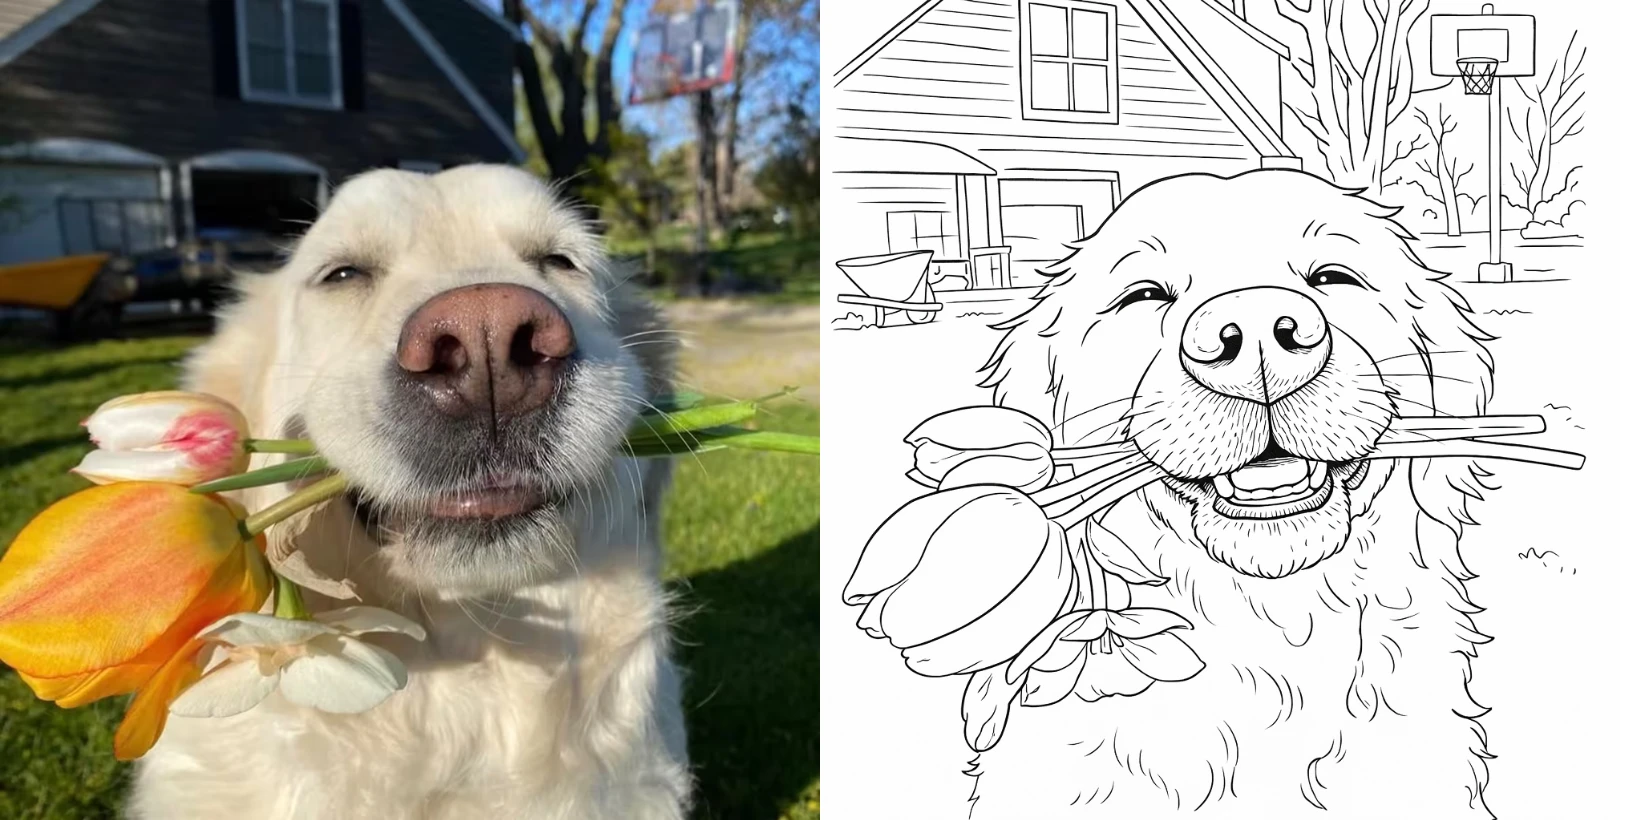
The photo and its page: a golden retriever with tulips, converted in one pass.
What you need before you start
- A Colorin AI account.
- Credits. The conversion spends some, and the cost per size shows on screen.
- A photo, up to 5 MB, as JPG, PNG or GIF.
Which photos work
Read this part before you upload anything. The photo you pick is what decides the page, so choosing well at the start saves the whole job.
A conversion turns areas of contrast into lines. So the question to ask about any photo is: can you tell where the edges are, just by looking? If the edges are clear to you, they will be clear to the generator.
What makes a photo work
- The subject fills the frame. A dog taking up half the photo becomes a dog. The same dog thirty feet away becomes a smudge, because there were never enough pixels in it to draw.
- Even, plain light. Daylight near a window, or open shade outdoors. Harsh midday sun carves black shadows that come back as ugly blobs.
- The face in focus, if it is a pet or a person. It is where anyone looks first, and a soft face spoils an otherwise good page.
What does not work
- Dark or backlit photos. If your subject is a silhouette against a bright window, there is no detail inside it to convert.
- Motion blur. Blur has no edges, and edges are the entire raw material.
- Screenshots and heavily filtered photos. Compression artifacts and heavy grain get read as detail and drawn as lines.
What about the background?
Everything behind your subject gets drawn too, and usually rather well. The example further down this page was shot in a garden with a house, a basketball hoop and a wheelbarrow in shot, and all of it came back as clean line art. The page is better for it. The same happened with a photo of grandparents and their granddaughter on a sofa, converted on September 9, 2026: the three faces, the bookshelf and the framed photos behind them all came back drawn.
The living room comes along: grandparents and their granddaughter, Cartoons style.
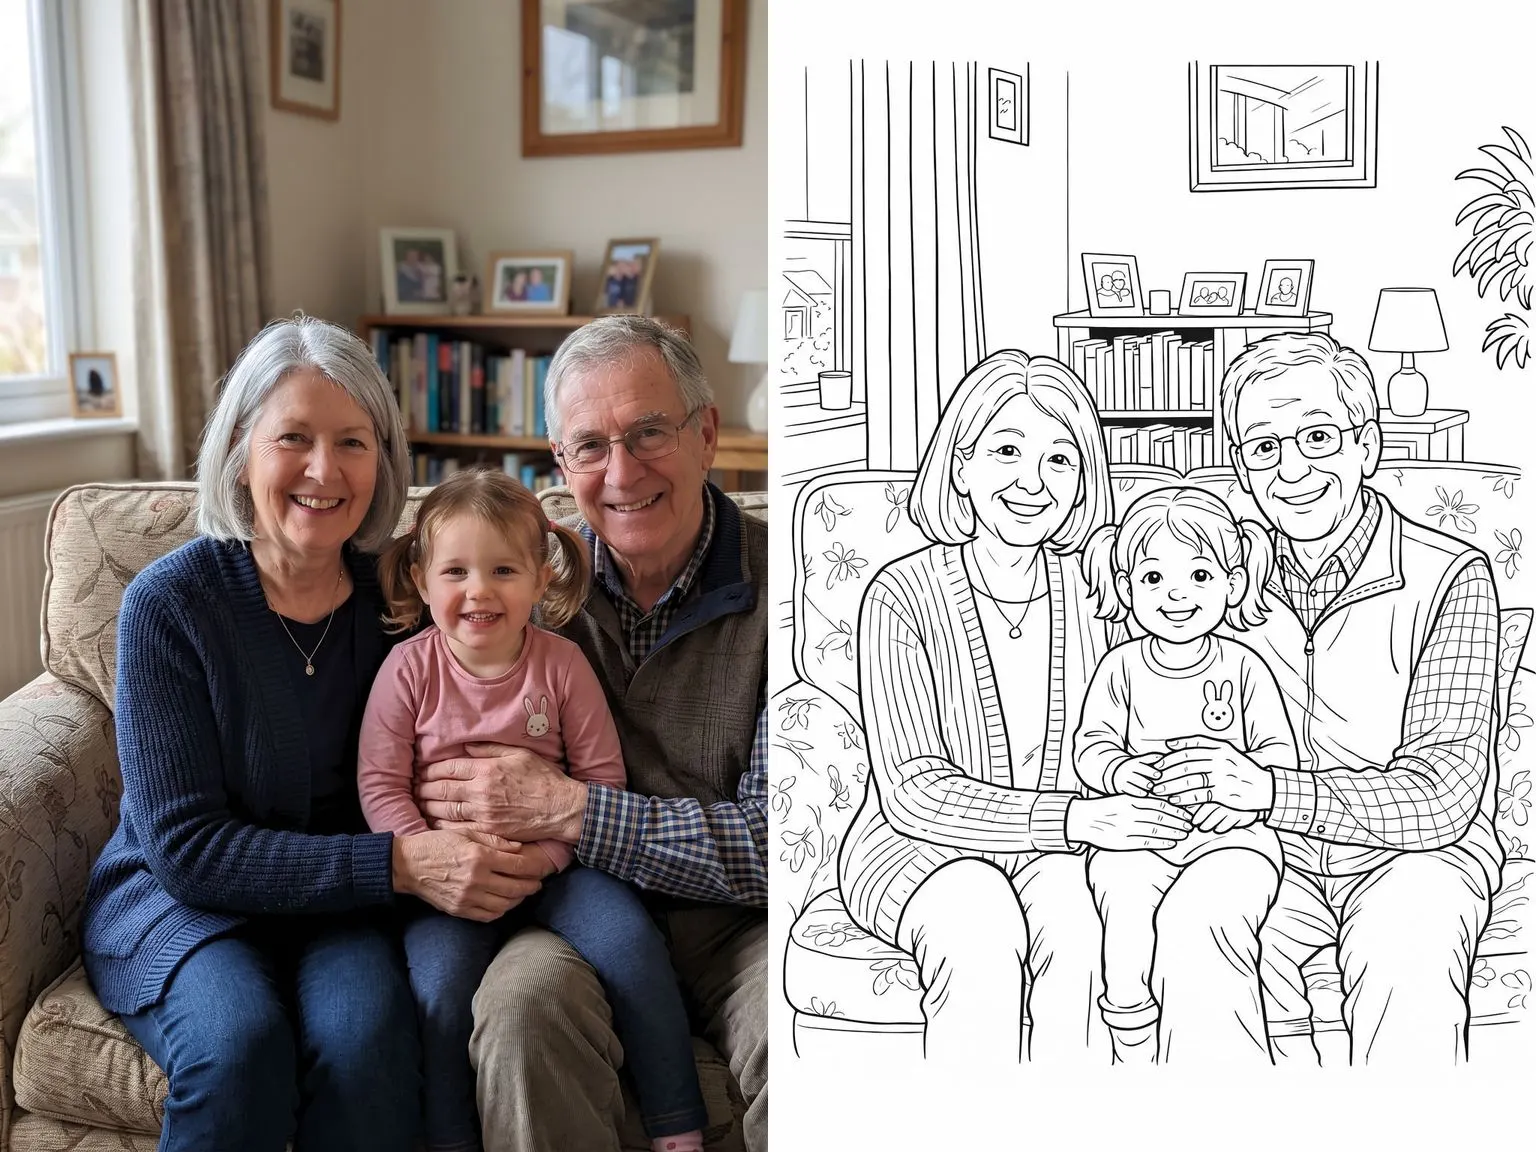
So a busy background is not a mistake. It is a decision, and what decides it is who will color the page. Every object behind your subject is one more area to fill in: a rich scene is a treat for an adult with an hour to spend, and a discouraging wall of small shapes for a four year old.
If the page is for a small child, shoot against a wall, the sky or grass, or crop in until the subject is most of the frame. If it is for you, let the background in.
When the photo is a customer’s rather than yours, you do not get to shoot it, so the asking has to happen before it arrives. The guide on how to sell custom coloring pages on Etsy lists what to request from the buyer and what to deliver back.
Step 1. Upload your photo
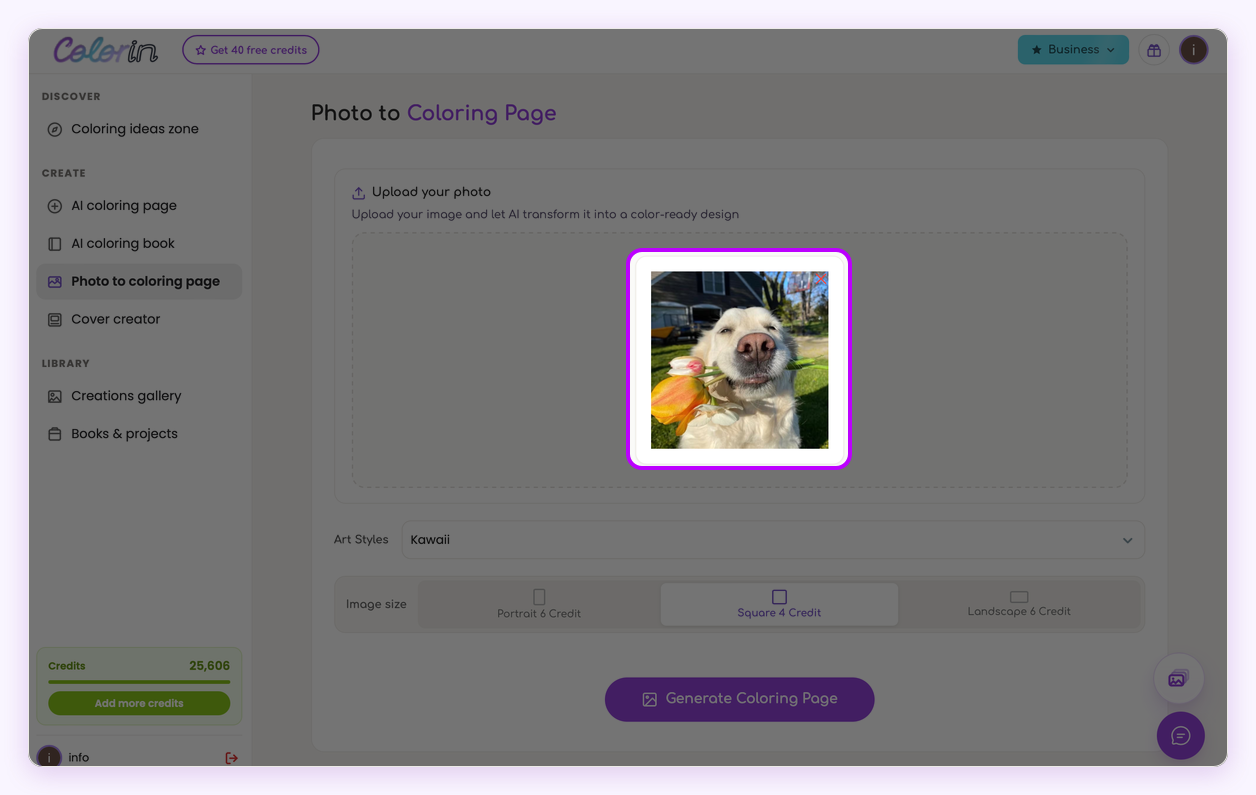
In the left menu, under Create, open Photo to coloring page. It is the third one down, and it is a different tool from the coloring page generator above it: this one starts from an image, not from a sentence.
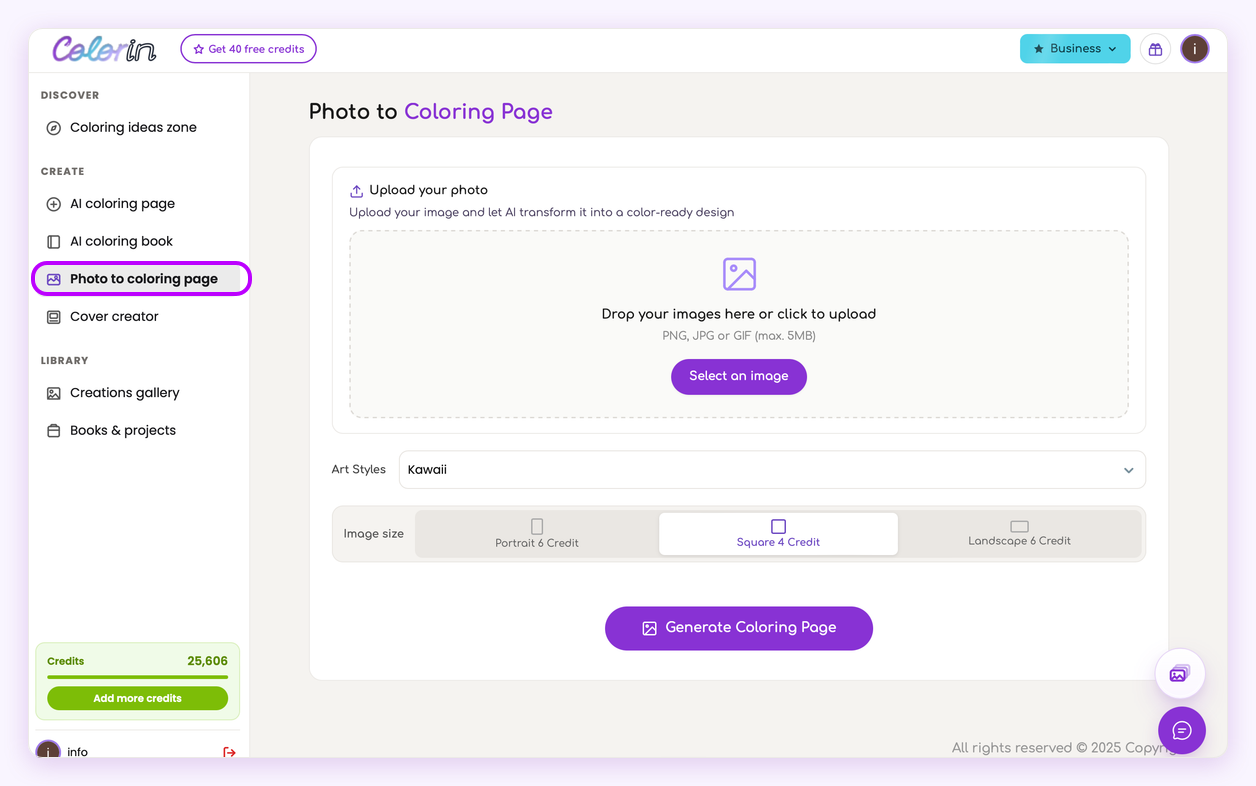
The upload card is the first item on the screen.
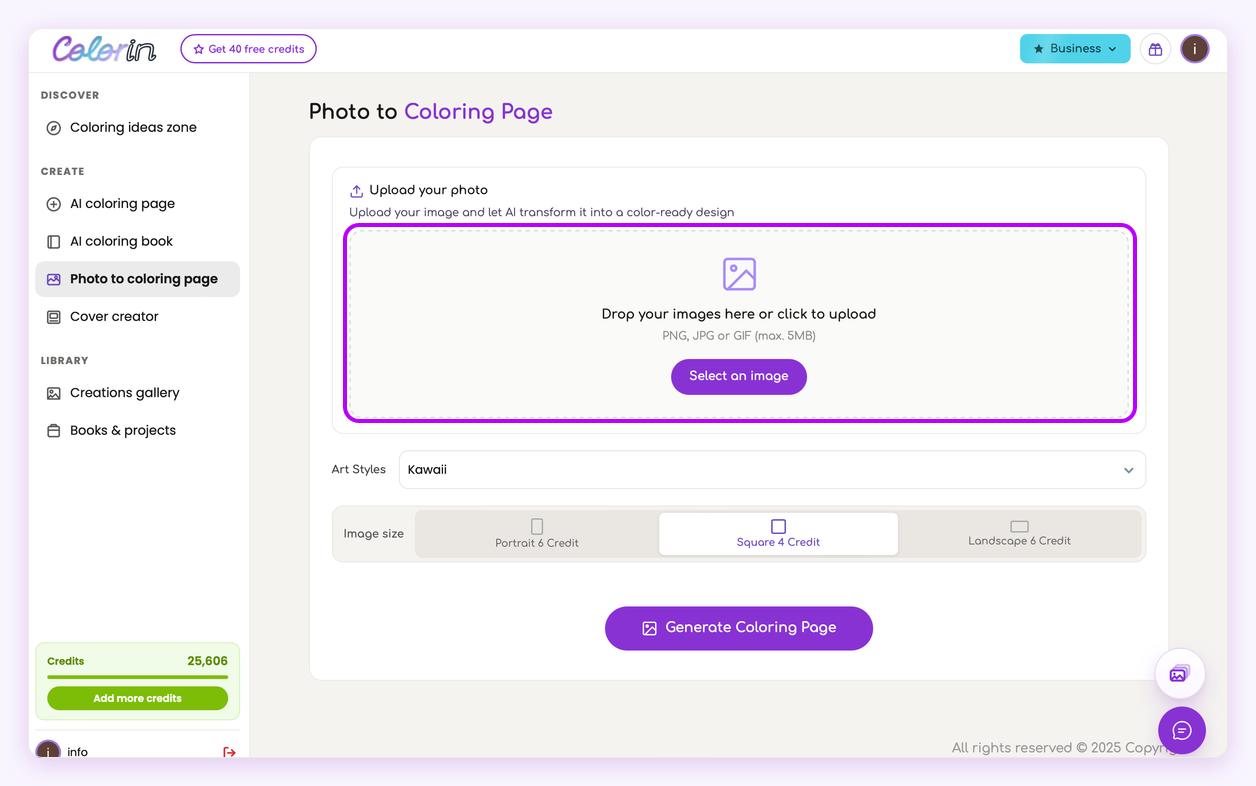
Limits: 5 MB, and JPG, PNG or GIF. If you get a message about an unsupported format, the usual culprit is a HEIC file straight off an iPhone. Exporting or screenshotting it as JPG fixes it.
Step 2. Pick a style and a size
Art Styles is the look of the finished drawing, not the thickness of the lines. The outlines stay the same weight in all of them, which is what keeps every page printable. Open the list and each option shows the same elephant drawn that way, so you can compare before choosing.
Style matters more here than when you generate from a prompt. The same photo comes back as a soft rounded drawing or as a dense detailed one depending purely on this, so it is worth a look rather than a shrug.
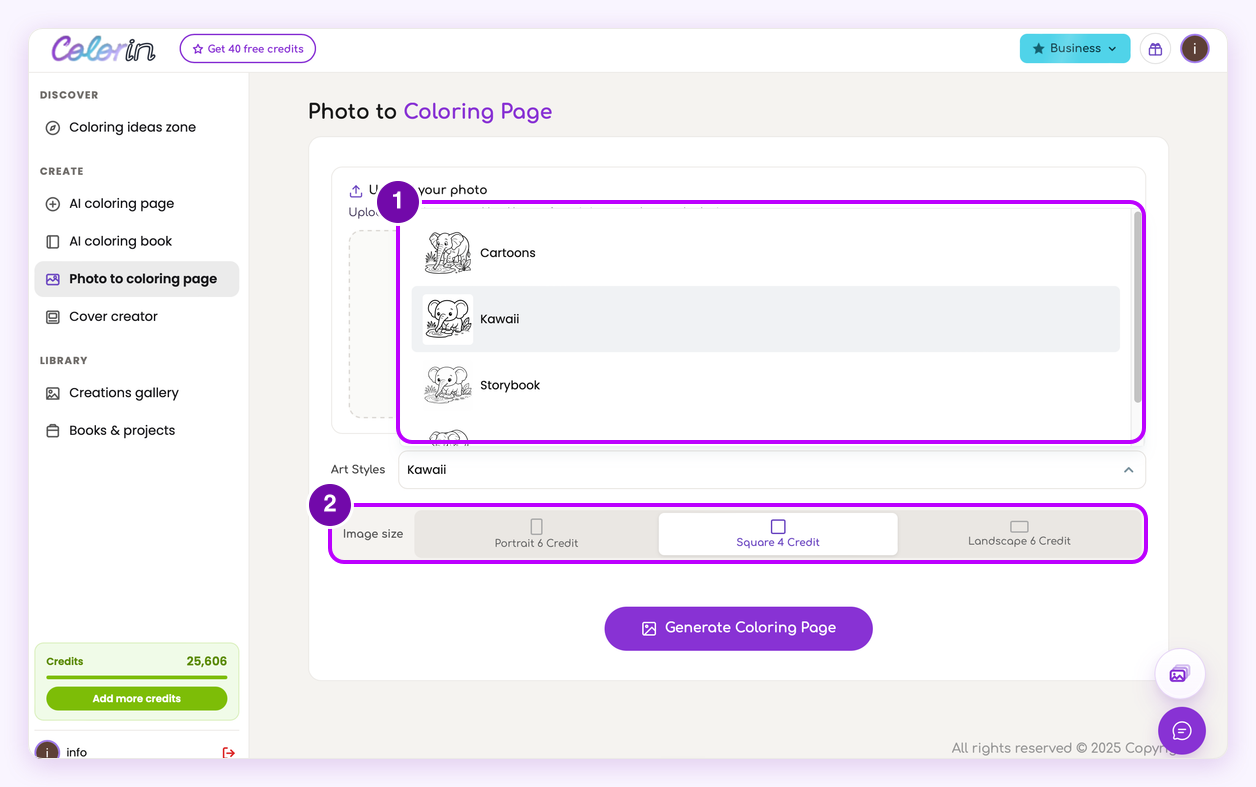
Image size sets the proportions. Portrait is the tall shape, the one to choose for a page you will print. Square suits social posts and stickers. Landscape suits wide photos, and a landscape photo squeezed into a portrait page loses whatever was at the sides.
Match the size to the photo you uploaded. It is the cheapest way to avoid a bad crop.
Step 3. Convert
Press Generate Coloring Page. It usually takes under a minute and can take up to two or three. You can leave the tab and come back. When it finishes you land in your gallery with the new page open.
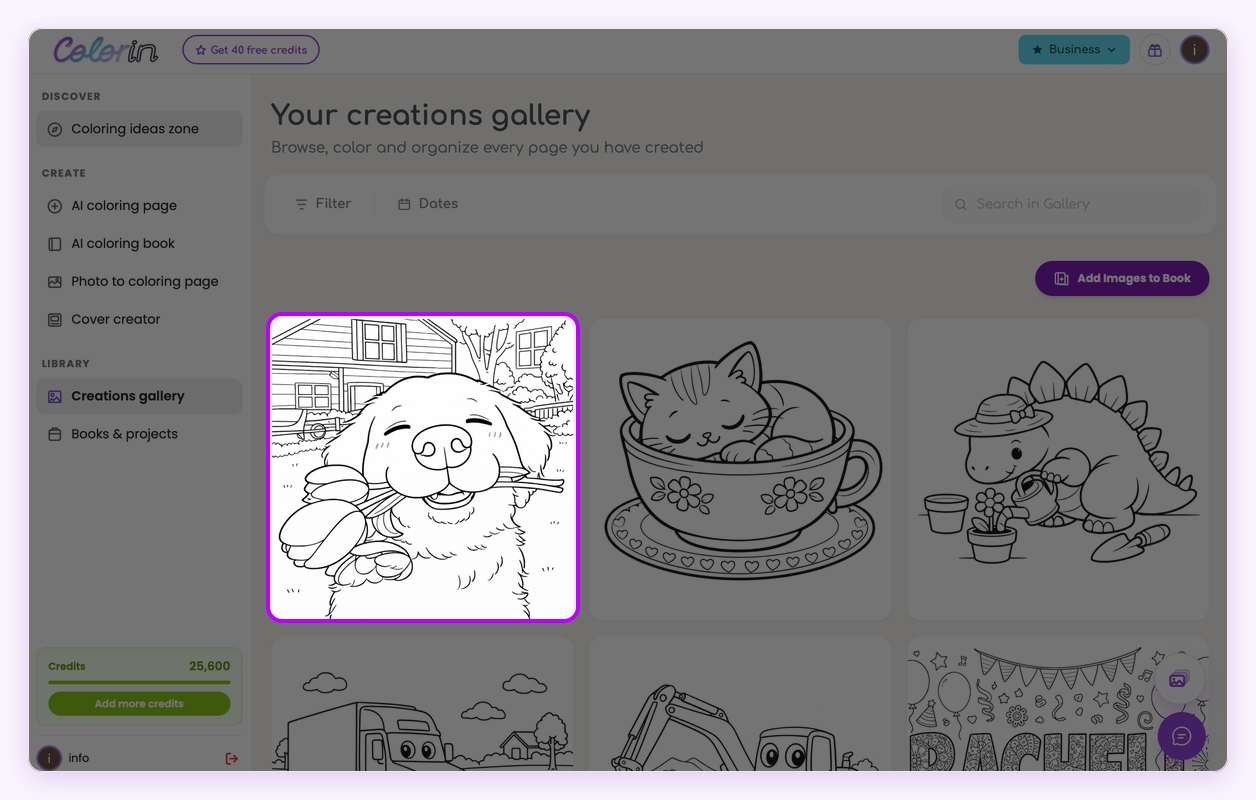
Click the page to open it and the panel beside it is where everything else happens: Fix Areas to redraw one part, Color with AI, Download image, Enhance Quality to scale it up for printing, Add to a Book, and Open in Canvas to draw on it yourself.
Download image is the file for a home printer. When the pages are headed for a copy shop, a print on demand service or Amazon instead, the guide on where to print a custom coloring book compares the four places and what each one charges per copy.
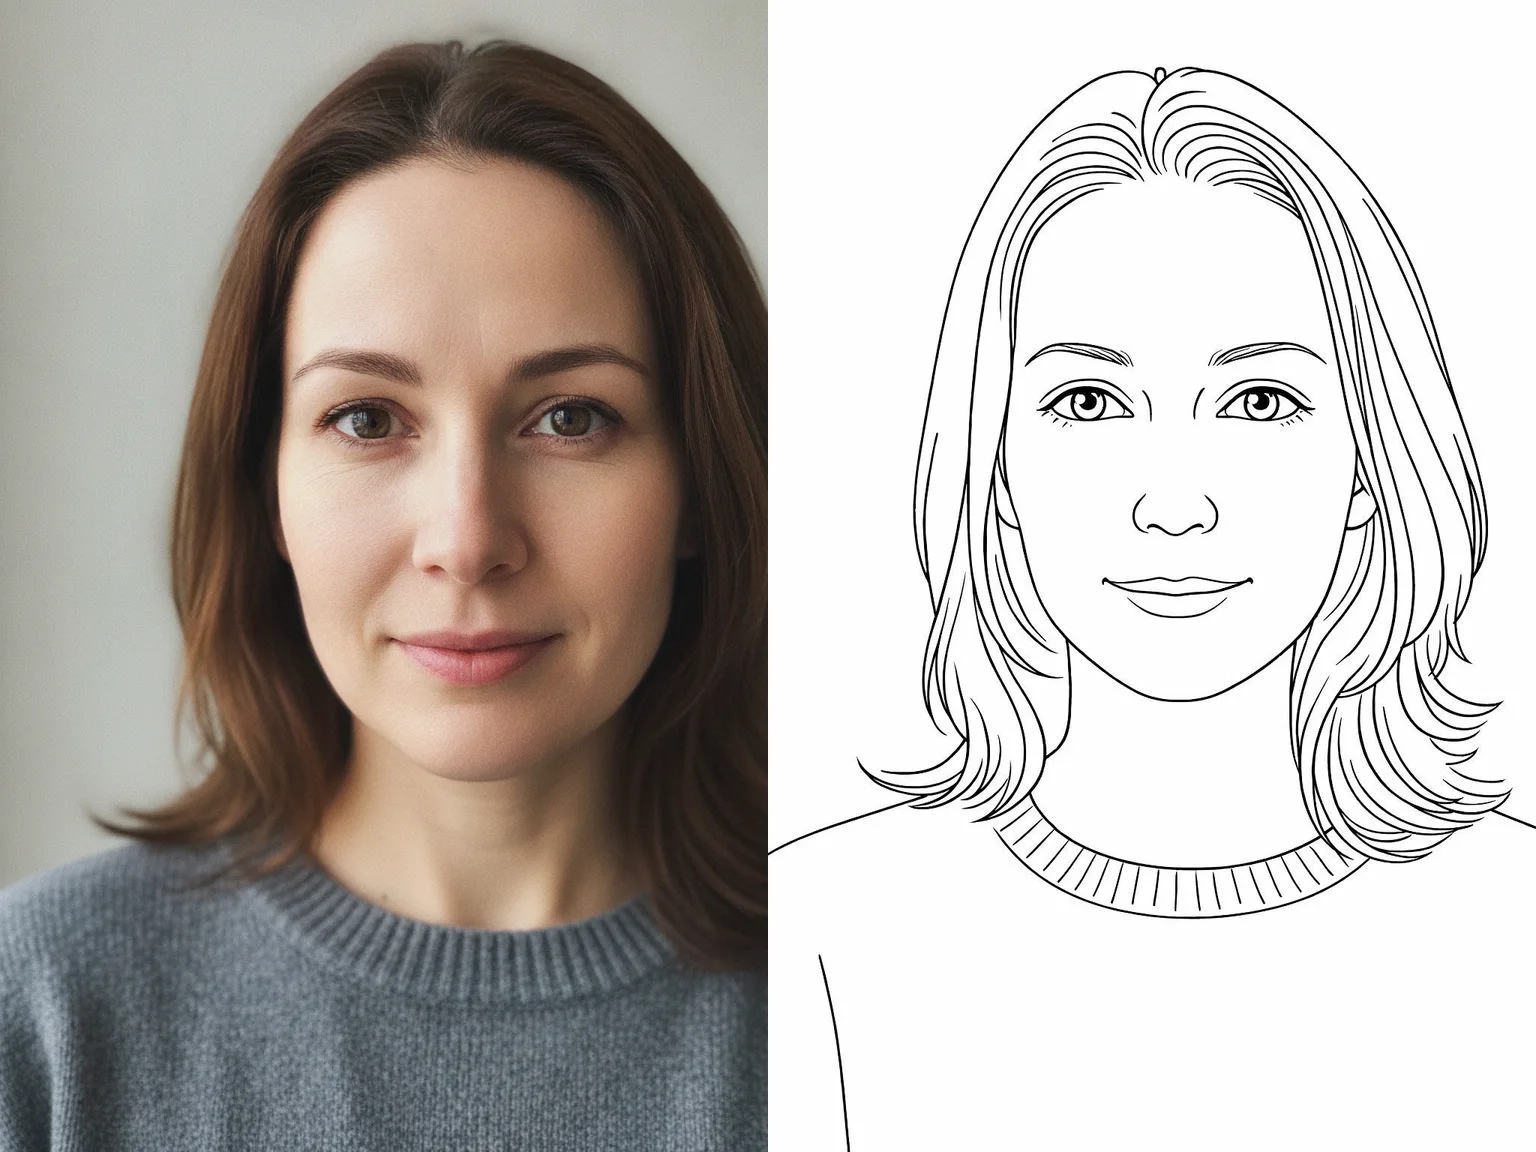
A portrait by a window: clean features, one pass, 6 credits.
Make a coloring page from the photo on your phone
Step 4. If the first one is not right
Work through these in order. The first two fix most cases and cost you almost nothing.
- Try a different style before anything else. One conversion, completely different result. Most people rewrite everything else first and never try this.
- Crop the photo tighter and upload it again. Making the subject bigger in the frame is the single biggest lever you have, and any phone does it in ten seconds. It also drops whatever was cluttering the edges.
- Try a different photo of the same subject. Better light, sharper face. Usually faster than fighting with a photo that never had enough in it.
- Use Fix Areas instead of redoing the page. If the page is good except for one paw, one ear or one corner, open it and paint over just that part, then describe what should be there. You keep everything that worked.
From one photo to a whole book
Once a conversion comes out well, that photo can carry a lot further than one page.
Upload the same photo in the book generator with Character lock on and give it a list of ideas, and you get your subject in a different scene on every page: the same kid blowing out the candles, the same kid holding balloons, the same kid hitting a piñata. One photo, a whole book, with a face that stays recognizably yours from page to page. A five page book made that way on September 9, 2026 took three minutes and 34 credits. The guide on making a whole coloring book takes the book side from the list of ideas to the cover.
One photo, five pages: the same boy in five scenes, generated together.
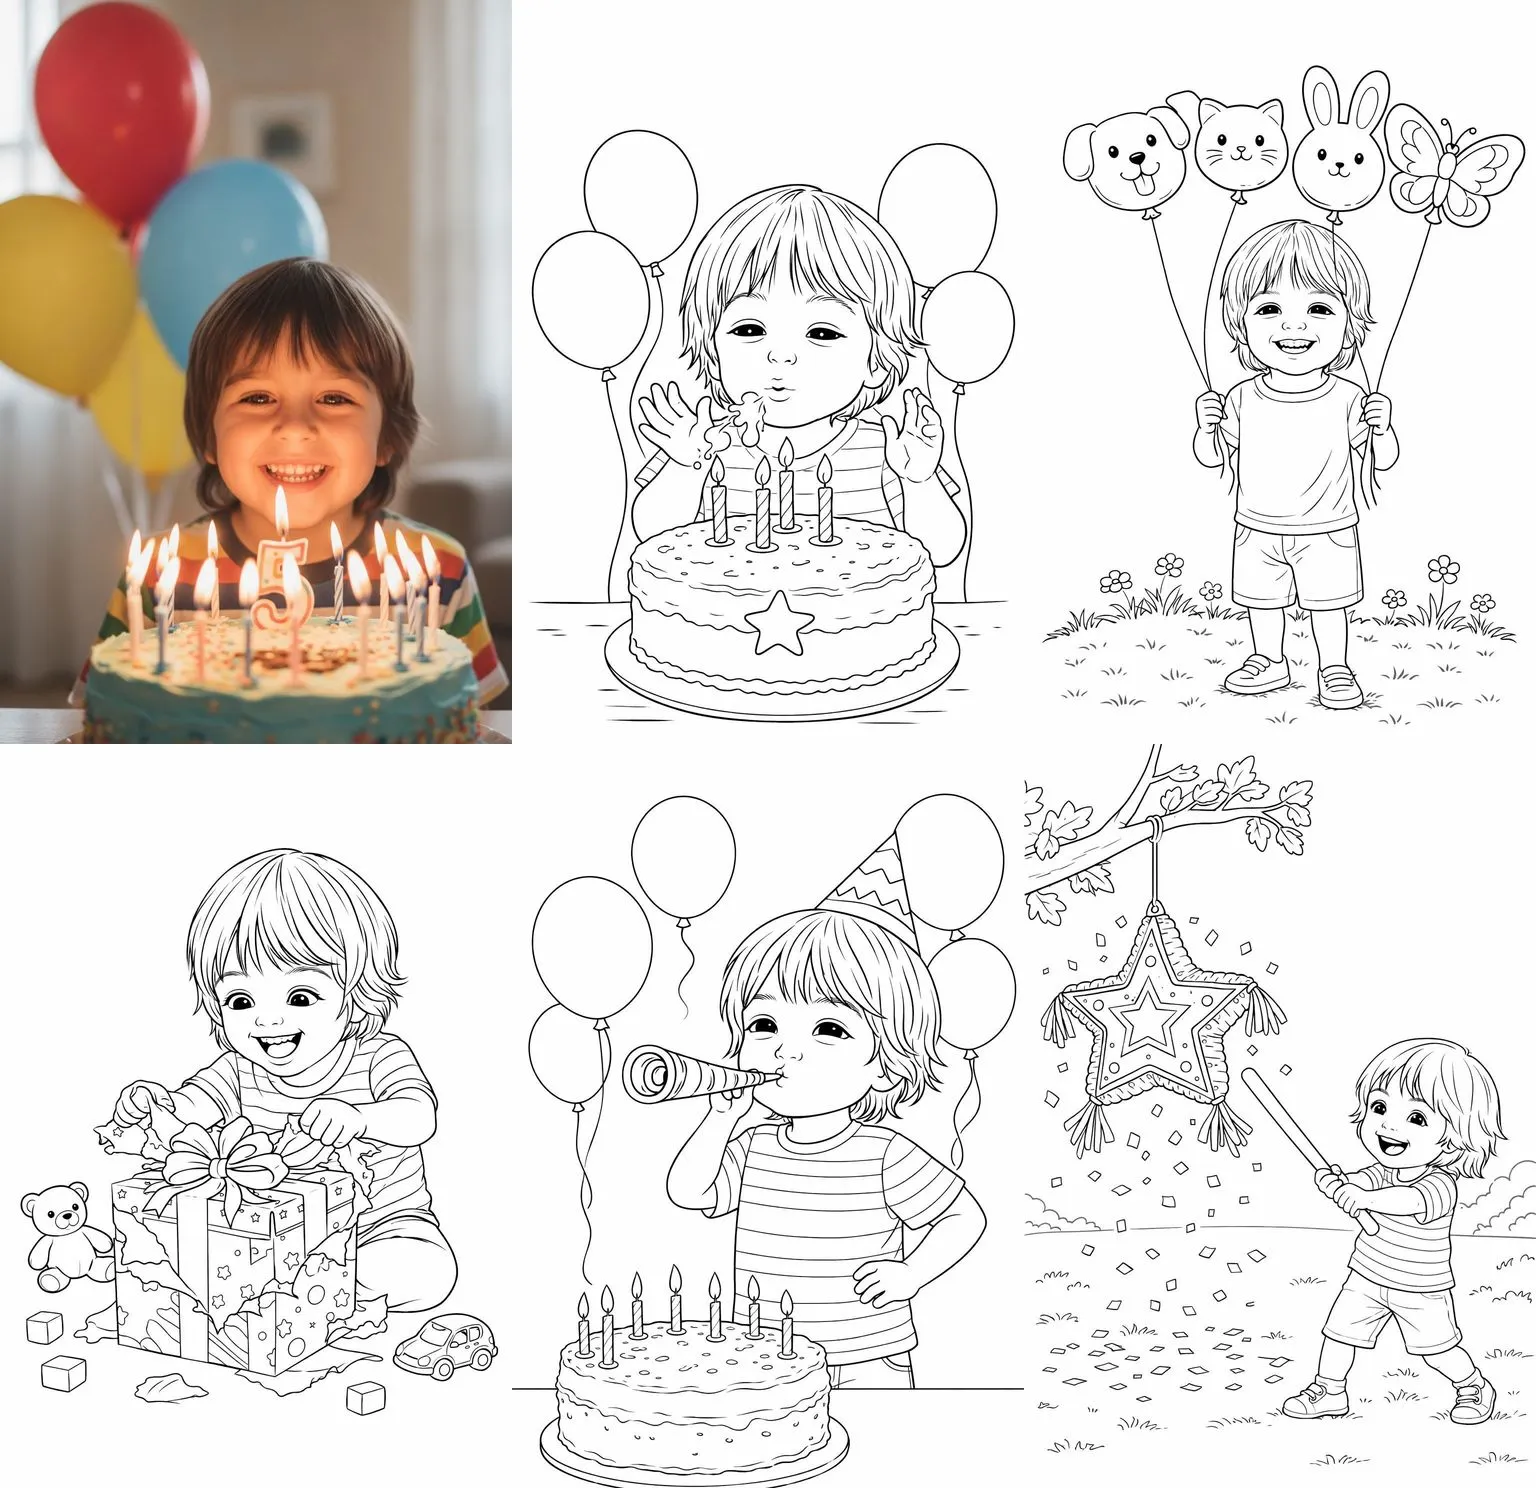
Fold those five pages into half letter and you have coloring book party favors with the birthday kid on every one, one book per guest.
Frequently asked questions
Can I turn any photo into a coloring page?
Technically almost any photo will convert, but the result depends on the photo. What you want is a subject that fills the frame and even light. Dark or blurred photos give poor pages no matter how many times you retry, because there are no clean edges left to turn into lines. A busy background is fine: it becomes part of the scene.
Can I use a photo of my dog or cat?
Yes, and pets are the most popular use for this by a distance. Get the eyes in focus and the background plain, and you will get a page worth printing.
What photo format and size do I need?
JPG, PNG or GIF, up to 5 MB. If your phone saves photos as HEIC, export or screenshot one as JPG first.
Can I turn a photo of a person into a coloring page?
The tool will convert it. Whether you should is a separate question: if the photo is of someone else, ask them first, and be careful about publishing or selling a page made from a recognizable face you do not have permission to use.
Why did my page come out messy or gray?
Usually the photo was dark, slightly blurred, or the subject was small in the frame, so there were no clean edges to turn into lines. Crop in tighter and try a photo with better light. A busy background is rarely the culprit: backgrounds convert well and simply become part of the scene.
Can I make a whole coloring book from my photos?
Yes. Convert the photo once, then use it in the book generator with a list of ideas to put the same subject in a different scene on every page. That way one photo produces a complete book rather than a single page.
Make yours from a photo, and turn it into a book
Colorin AI is an AI coloring page and coloring book generator built for creators who sell on Amazon KDP and Etsy, with generation from a written prompt or from a photo, character lock for consistency across pages, and print-ready export sized for KDP. Written by Kisbel Blanco.